THE CURRENT VEHICLE
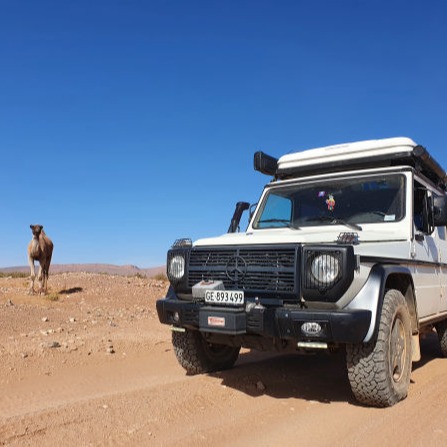
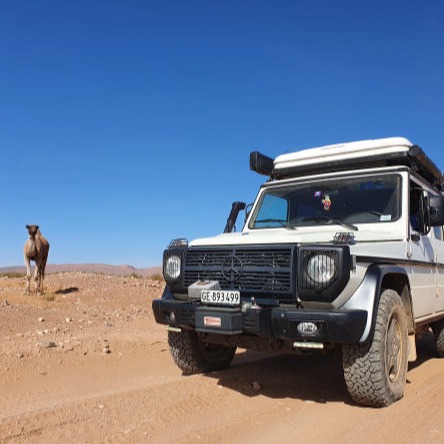
In my case I was looking for a 5-door 4x4 with a classic look, which boils it down to few candidates: Toyota 70s series, (old) Defenders, and G-Wagons. Having wanted a diesel engine the choice in my case came down to Defender and G-Wagon. I am too tall for sitting in a Defender comfortably, so my choice was made.
One of the important pros of the G Professional (W461) is, that as with any G-Class, it comes stock with many features that are often upgraded in other 4x4s, such as the 3 diff locks. Further, in my opinion the "rough" version of the G-Class is simply the best looking, building on the Geländewagen's heritage while boasting a powerful modern diesel engine.
Obviously there are the cons, including the limited availability on the market: only few G 280 / 300 CDI were made and the new rough version, the W464, will probably never be made available for civilian use due to emission standard requirements that are not met. This limits you to buying a used one, and yes - prices are steep (though all "classics" seem expensive now). Parts are also expensive, sometimes ridiculously so (I was quoted 300 USD for a bolt once by the local MB concessionary and we all had a good laugh, including the salesperson). This is largely offset by the incredible availability of parts: Mercedes-Benz is known to have spares in stock for decades after the last vehicle of a series left the assembly line.
For those who decide to take their G-Class around the globe I have started putting together a Google Maps list with mechanics beyond mature markets that should have experience in servicing and repairing G Wagons. Please do let me know if you can contribute, it currently only contains entries for Africa.
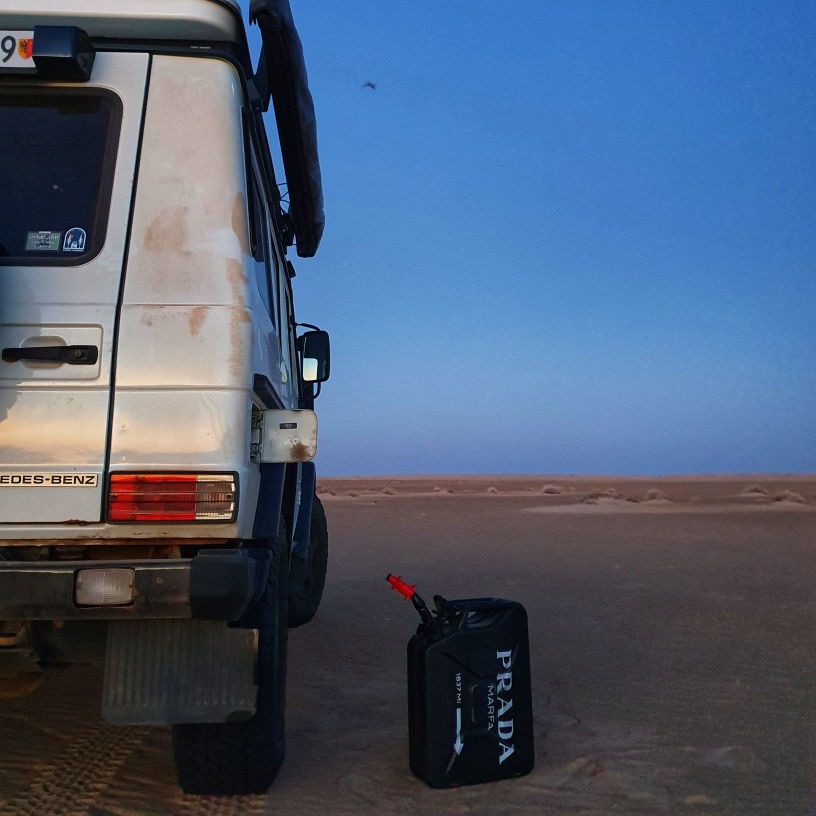
Fuel: I feel there is the need for a special note on fuel. My G runs on diesel. On the trip to Central Asia as well as the South America loop I had gasoline engines. Now, there are advantages to either, diesel or gasoline, but I am not discussing that here. I am talking about diesel quality. South of Morocco, for instance, there will not be any diesel quality comparable to what is sold in Europe. Now, cars sold in Europe will need to adhere to emission standards and are equipped with ever more sophisticated systems that make the cars compliant with those standards. These systems do not like dirty fuel.
I have met people who have made it all the way down to Senegal with an EURO-6 compliant engine using Ad-Blue. But that was the end of it. They had to have their vehicle towed or transported to Dakar and spent days running around trying to find someone who can assist them with recoding their car and make it run properly.
Below I am listing the gear I am using and the modifications I made to the car. I am also adding some Amazon links to some of the stuff so you can find it more easily. No need to buy from there but if you do, a couple of cents will go toward the hosting fees for this site.
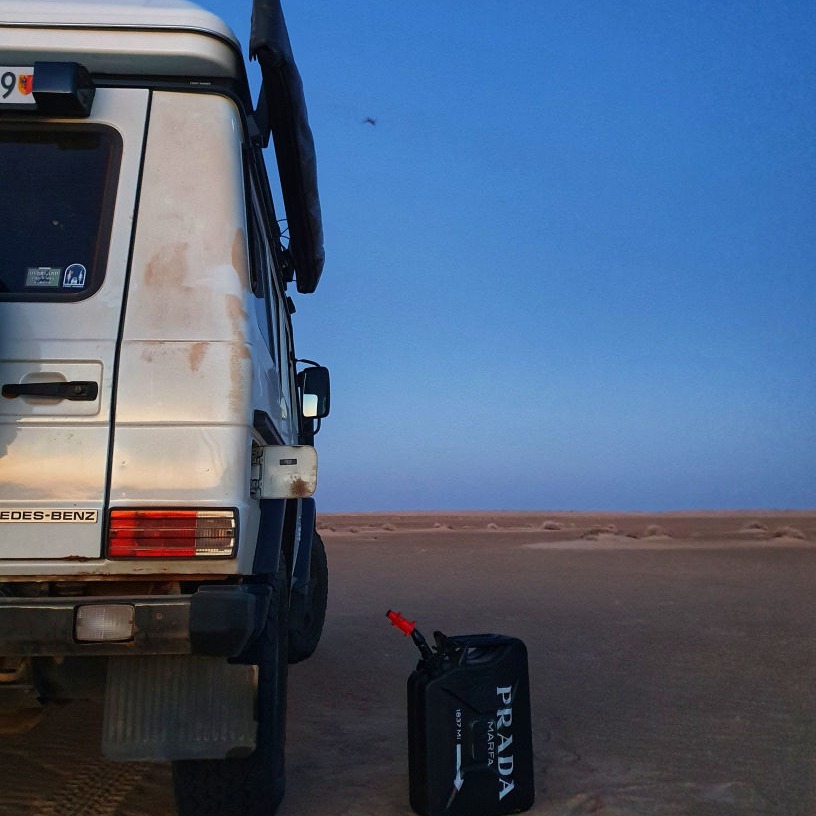
As for fuel, I am using a Mr. Funnel fuel filter whenever diesel quality may be questionable (e.g. all of West Africa). It separates fuel from water and particles before it goes into the tank. While it slows down fueling and makes for puzzled faces at the pump, it allows me to assess the diesel quality (visual and smell test). I usually ask for 20 liters and if the quality seems good enough, then I add more.
Keep in mind that my setup described below is mainly thought for regions with warm temperatures.
Possibly the most important choice regarding the camping equipment: how will you spend your nights? Remember, this is a significant share of your time traveling.
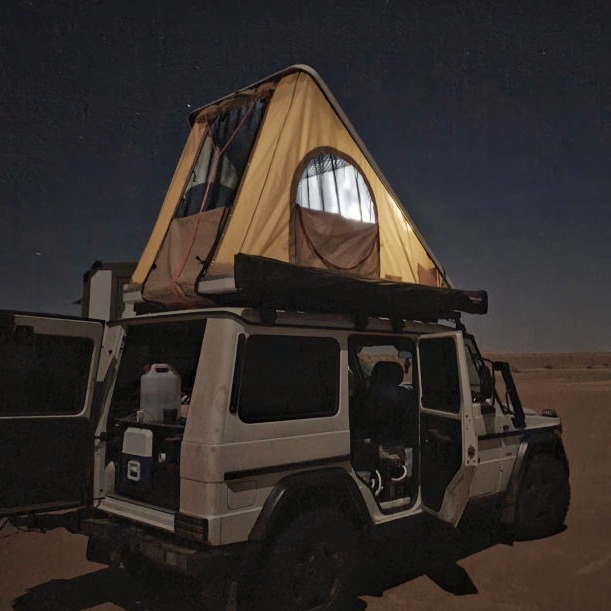
Roof top tent: I went with Autohome Columbus. This, after having done quite a bit of research and testing several options personally. I strongly suggest you do the same, even if it is an extra effort. In my case, I really liked the looks of Autohome's classic Maggiolina. However, when testing practically all their versions I realized that being a tall person I would not have enough space and not even be able to sit upright, a big issue on a rainy day. The Columbus opens like a shell and having taken the X-long version I am comfortably lounging inside a 230cm x 45cm tent. A bit of a downside is the weight of 71Kg (one more reason why you might want to buy it from a local vendor who may be able to help you mount it, I underestimated the effort involved).
Awning: after one year of trips I decided to get a bit more protection from sun and weather. Moving chairs all the time to sit in the car's shade is not ideal. Also, as I am cooking outside, a rainy day quickly turns into a bad-food-day. I went with the classic Rhino-Rack Batwing, which is a sturdy 270-degree awning and that I can open and close by myself easily (this is important! I have seen enough solo travellers never opening their awning because it's too burdensome to do so alone). I love it.
Roof rack: all that stuff sits or is attached to a Frontrunner slimeline II rack. Looking back, this is potentially something I would do differently next time as my X-long Columbus is too long to fit nicely within the outside rails of the rack. It is basically sitting on the rails and I needed to build my own additional rails to attach the tent to the rack. The space between the roof and the rack is very limited, which makes it impossible to loosen the tent bracket bolts without "adapted" tools (which can be a good or a bad thing, depending on who is trying to take off the tent). The advantage of the slimline is that they produce a wide range of accessories - including brackets for the Rhino-Rack awning. Though even here I had to adapt the brackets so that the RTT still sits nicely centred on the slimline.
Staying safe: I have started using a Garmin InReach Mini 2, which lets me send text messages via satellite. This is the tool of last resort should all else fail and I need help. As for now, I have always been able to send and receive my texts, even if it may take a little while sometimes (I have waited up to a maximum of 30 minutes).
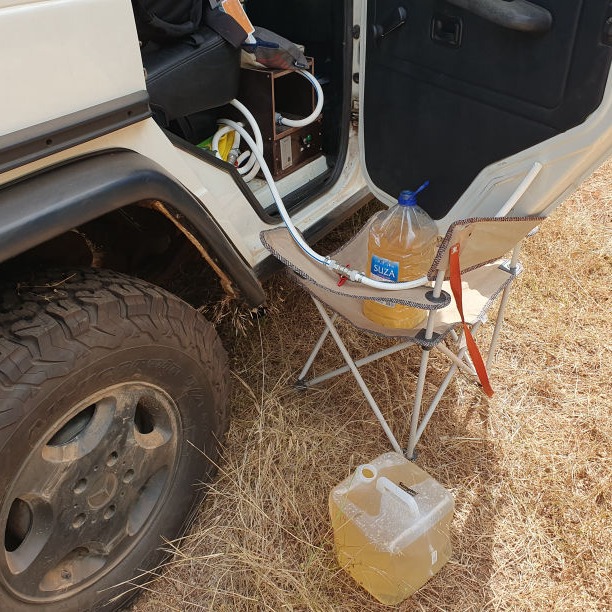
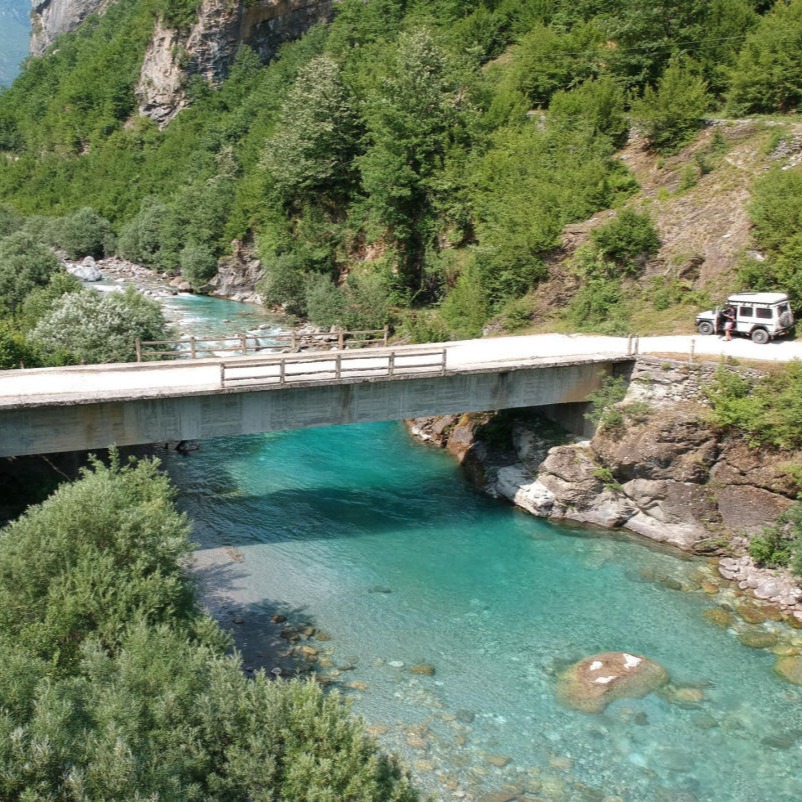
This was a very time consuming upgrade but one close to my heart: being able to get potable water from almost any sweet water source (see the yellow color of the water on the photo?) allows me to completely free myself from buying bottled water, which is causing so much pollution. Especially in remote places it can be hard to dispose of plastic waste in a responsible way and therefore, for me, buying bottled water is a clear no-go.
The reason why I am covering this topic in a bit more detail is that at the time, I found it quite hard to find valuable information on. I assume that most overlanders will not need this as they hardly ever find themselves in a situation where they cannot find a clean water source to fill up their tank.
This is different however if you start going, say, into remote areas of Africa. It may even become hard to find bottled water in some places. In Guinea, I did not see any. What is often used by locals is water filled in plastic bags, which is the devil, as often the only garbage present in otherwise pristine nature was such empty bags (outside of major cities, food is sourced locally and there is hardly any packaging). Most overlanders I spoke to about this topic used one-stage filters only and seemed to be happy. Not knowing what the water source situation will be like and being a tinkerer, I wanted to try to build something better than that for my Westafrica trip.
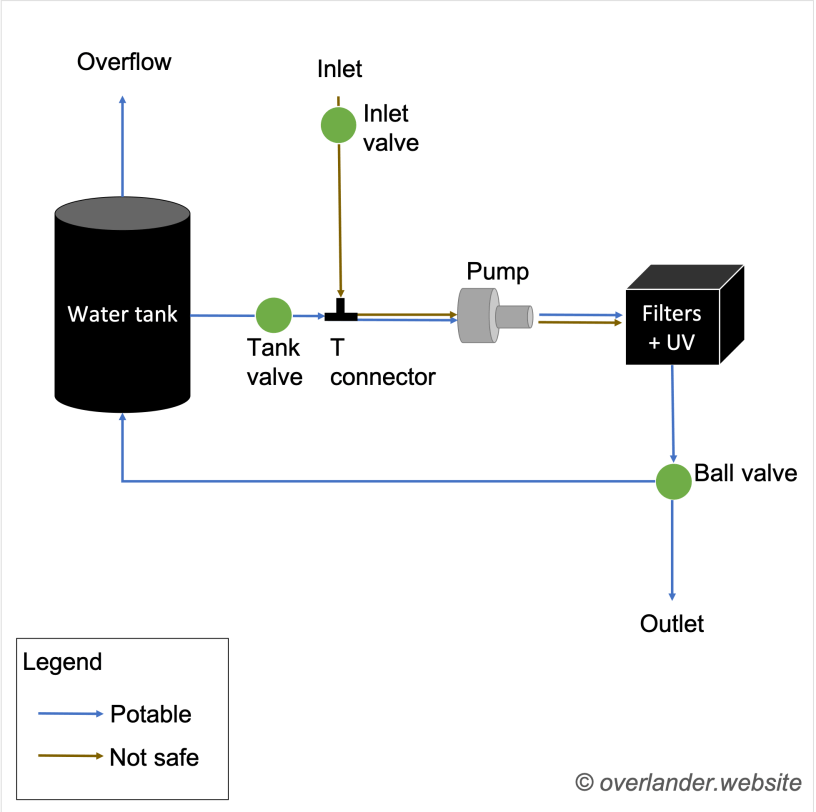
I based my design on Dan Grec's excellent description of the setup he built for his Africa trip, using a particle filter, a coal filter, and an UV lamp working concurrently twice: once when filling the tank and once when taking water from the tank. Unfortunately, many of the products he used at the time were not available to me in Europe or are not on the market anymore.
I adapted the Dan's design to my needs and importantly, added a tweak: from the supplier of the UV lamp I learned that the lamp needs about one minute to heat up and to become fully operational (hence during that time contaminated water can pass the UV lamp). The salesperson suggested letting the pump run for a minute while the lamp is heating up and then use that water say, for showering. This, however, did not seem practical to me as I do not want to lose four liters of water every time I use the setup. Therefore, I built in a "closed loop" from the tank to the pump, to the filters, and back to the tank. This way I could use clean water from the tank, let it run through the UV lamp while it heats up, and then back into the tank. After one minute I would switch the ball valve from "closed loop" to "out" and take water. This pre-heating is even more important when filling the tank, when the water source may be not at all safe for drinking. In this case you really want to make sure your UV lamp is fully operational before dirty water flows through it into the tank.
For practical reasons, I decided to not have the water treatment system run "on demand", but to rather fill up a 10 liter jerrycan every morning (or whenever the jerrycan was empty). I am still on my quest for the perfect water jerrycan for that purpose, in the meantime, I am quite happy with the ones from Pressol.
Finding the right water tank for my setup was not easy. I wanted to keep the bench in the back of the car so that it looks as stock as possible and to be accommodate two passengers, if need be. Though I could not find a tank that would be flat enough so that I could have it lay in the space between front and back seats so that you could still sit more or less comfortably. I played with the thought of building my own HDPE tank but after much reflection I decided not to in order to minimize risks on my Africa trip. A leaking tank would have been very problematic. I went with a 65-liter stock tank that fits snug underneath the bench in the back but leaves enough space for your feet. I then equipped the tank with a tank electrode and level indicator from Votronic. Note that the electrode's range needs to be in line with your water tank's height. The level indicator is adjustable. I do not consider this a luxury, as knowing your water level is absolutely crucial when heading into remote, dry areas.
As water pump I went with this Shurflo 12v, 1 gallon per minute-specified model. The Shurflo has not let me down yet and I am very happy. Next time I would probably take a bigger size as I am getting slightly below four liters per minute, considering the resistance of the filters. Also, the Shurflo has to work hard to suck water out of the tank as the pump is installed on about the same level and it would not work when I added a screw filter before the pump to keep out sediments. Pushing water through the filters seems to be less of an issue.
$49
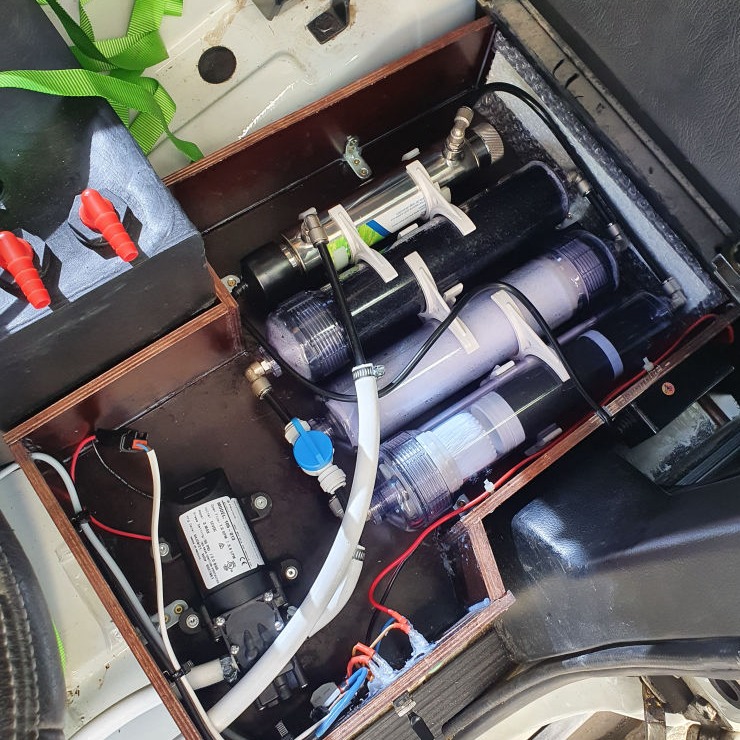
Time to have a look at the inside of the mystical black box containing the filters! As mentioned above, I had a hard time finding a solution that provides the filters and the UV lamp at once. The only viable option I found was Bellerfonteacqua's camping kit. This is a company based in Italy, shipping within the EU. I found that communications worked best when I contacted them via WhatsApp and writing in Italian. Do not expect a quick answer during summer holidays.
Their filter kit consists of four stages: 1) an activated carbon filter, 2) a sediment filter, 3) a membrane filter, and 4) an UV lamp. Make sure you verify they sent you the right stuff: in my case they sent me a 220V wall charger and a UV lamp that was below specification (they sent me a 5W lamp, but it should have been 11W to be able to handle 4 liters/min). They sent me the additional materials for free but I was in a bad rush to finish the assembly in time for my trip and as a result, I cut my finger doing final woodwork.
Installation was flimsy, to say the least. This is not unexpected, given the realatively low price tag. Be careful when fixing the filters in their holders: the first time the sediment filters' top broke off and I still do not know how the membrane filter's two elements are supposed to not fall apart without me using tape.
This is also the point where I need to mention my most luxury superfluous gadget: I am crazy about sparkling water. I took a Soda Stream and two CO2 bottles with me. I cannot recommend to do so as it comes with risks (use Google to check for leaking bottles left in hot cars). I did not know that beforehand and when I learned about the risks from travelers I met in Morocco, I decided to keep the CO2 bottles in my fridge.
$49
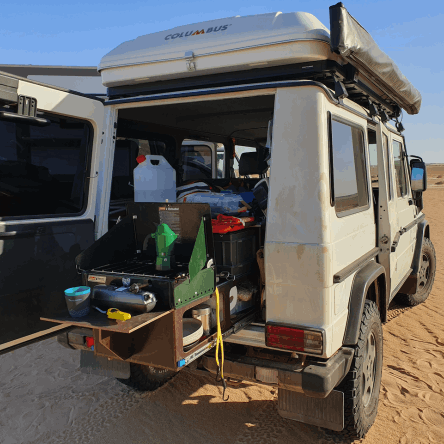
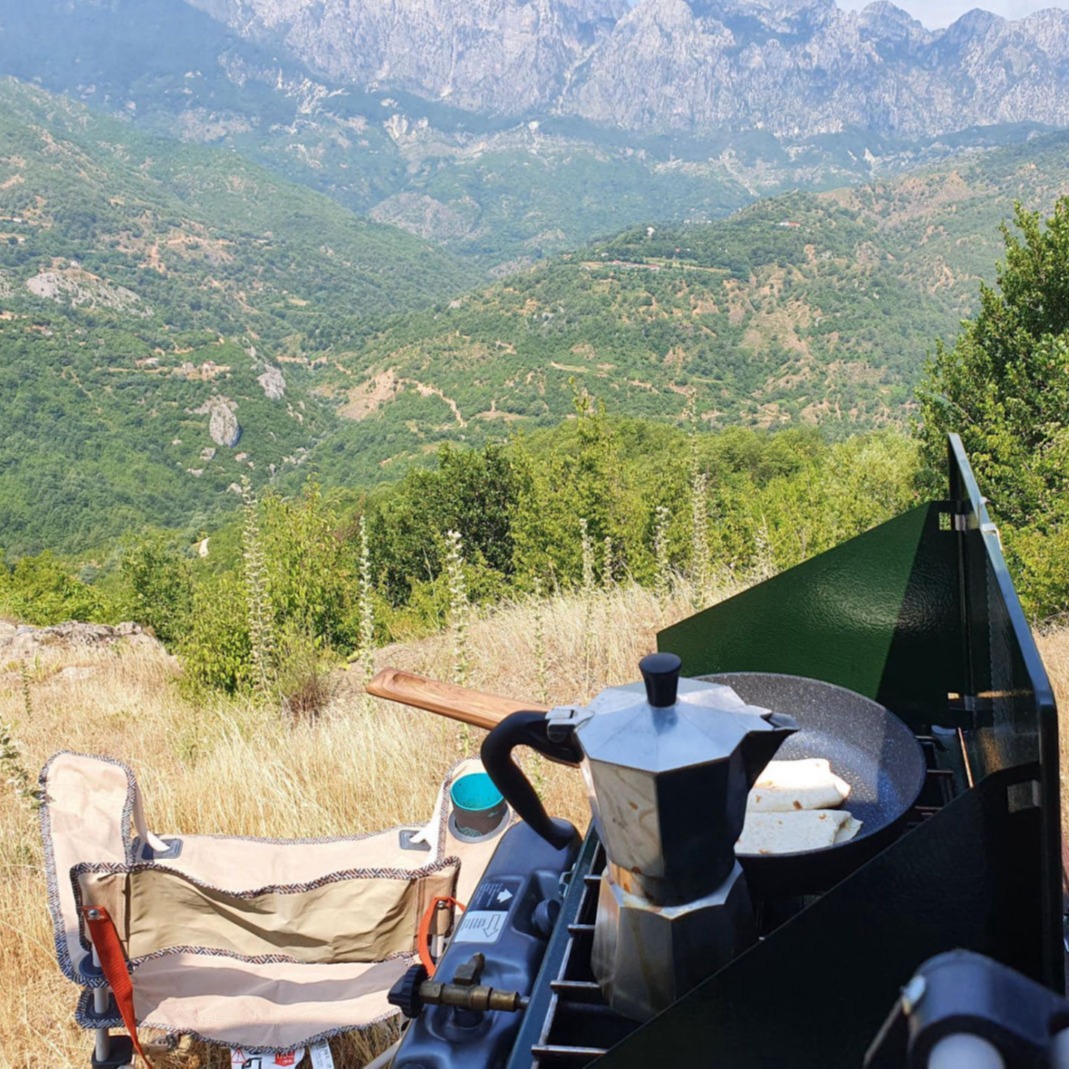
"Where there is water there shall be coffee". First thing in the morning for me is ALWAYS coffee. No exceptions. To brew with style, I am using the Bialetti Moka Alpina for which it is easy to get replacement seals, of which I always bring along a couple.
I have tried different cooking setups, butane, propane, and whatnot. You may have noticed by now that I am usually striving to have my setup in a way that makes me as independent as possible. Same goes for my kitchen. I am now using a gasoline-fuelled Coleman stove, which I bought in preparation for my Africa trip. I do not want to be bothered with looking for one-way bottles or dealing with organizing a different adapter for each country to refill.
There is one catch though: in countries where diesel quality is bad, gasoline tends to be dirty as well and the Coleman is a bit of a diva. You can still cook but the stove will eventually clog, and for sure will produce lots of smoke (along with the typical yellow flame that is far from ideal). I have seen that induction plates are becoming more popular among overlanders. I think that's an excellent alternative for those who have a bit more real estate to accommodate the additionally required batteries and solar panels.
Speaking of electricity: another, for me absolutely necessary item, is the fridge. I am using a 32-liter Mobicool fridge (I was eying the ice-cube making Dometic but my better half reminded me to be reasonable at some point), connected to a 720Wh EcoFlow lithium battery that is charged by two 90W flexible solar panels taped with 3M double-sided tape to the RTT or, when the engine is running, the alternator. A lesson learned regarding flexible photovoltaic panels: do your research. The first pair (bought from China) did not survive four months and never got even close to its supposed output. Not sure if I bent them too much, or whether overheating was the issue. The second pair (bought from an EU supplier) is still working after four months of Africa under harsh conditions (think of the Sahara desert). I know you are not supposed to directly tape them on the RTT shell, but putting an aluminum plate between the shell and the panels was simply not practical.
I am not going to cover my electric setup in more detail here, as it is specifically adapted to my car's 24V / 12V parallel circuits and the topic of solar panels and batteries is covered and discussed on an endless number of web pages and forums. The only thought I want to share is that the advantage of the EcoFlow is that it already contains a lot of modules that I would have had to install in addition and I can save a lot of space and wiring: it comes with 12V and 220V outlets (I do not need yet another converter!), as well as several USB outlets. I simply added extension cables to all those outlets and connected them to sockets in the back of the trunk, next to the fridge slide. I was not sure whether the EcoFlow would survive my Africa trip and took it along to test how rugged it is. Luckily, it has not failed me and I will continue using it. Enjoying cool, 100% sustainable sparkling water at lunch time in the Sahara is about the best thing you can have...
...ok, I must admit a cold beer in the bush after a hard day on dirt tracks will probably beat it.